
Laying stone carpet: a durable and aesthetic flooring option
Stone carpet installation is an excellent way to add a unique and aesthetically pleasing floor covering to your home or commercial space. A stone carpet combines the beauty of natural stone with the durability and easy-care properties of seamless flooring.
Entrepreneurs who would like to learn how to lay flooring in a training course can go directly to the registration page by clicking on the button.
Contents
- Where do you learn how to lay stone carpets?
- What does a specialist need to lay a stone carpet?
- How to lay stone carpet in rooms
- Expansion joints must be used when laying stone carpets
- Apply stone carpet logo
- Laying stone carpet on the outside – what to consider
- Why should you have a Qubo® stone carpet installed?
- Who lays stone carpet?
- Non-binding Cost estimate
- Link collection
- FAQ
These advantages result from offering seamless floor coverings Where do you learn how to lay stone carpet?
Due to the enormous demand, more and more aspiring and experienced craftsmen are considering expanding their portfolio to include stone carpet laying. Floor laying can be perfectly combined with other trades, for example with
wall design, gardening and landscaping or with sanitary services.
This results in advantages for customers and tradesmen alike. The customer is happy when he does not have to coordinate the work of several tradesmen, but has only
The ideal place to learn how to lay stone carpets is a professionally structured training course with theoretical and practical sections, as offered by Quarzkiesboden Zimmermann. Experienced instructors impart their knowledge and demonstrate important laying techniques that ensure rapid learning progress. Training participants learn directly with the material that is also offered in the Quarzkiesboden Zimmermann store: Marble gravel, quartz gravel, binders, primers and sealers from the Qubo® brand as well as suitable laying tools, rails and skirting boards.
To register for the training course, go to the training page of Quarzkiesboden Zimmermann.
What does a specialist need to lay a stone carpet?
Laying a stone carpet requires a number of materials and tools. The following list describes the basic things you need for laying.
Material
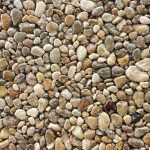
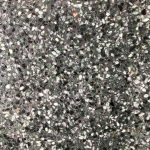
- Marble gravel or quartz gravel: The main component of every gravel floor. It is available in many different
colors and grain sizes. - Binder: Bonds the individual pebbles together to form a robust floor covering. Different materials are used depending on the area of application.
- Additional components: Depending on the area of application, additional components such as sealants, primers or sealants may be necessary.
Tool
- Spit barrel: For mixing large quantities of gravel with binder.
- Bucket: For mixing the resin components.
- Scales: For weighing the individual components.
- Agitator: A cordless screwdriver with agitator attachment can be used for small quantities, a stone carpet agitator is recommended for larger quantities.
- Laying trowel: Floors are laid with a trowel, smaller trowels are used for walls and skirting boards.
- Gloves: To protect your hands when working with the binding agent.
- Spray bottle: For spraying the laying trowels with release agent.
- Hot glue gun: For attaching the end profiles, e.g. when creating skirting boards, rails for stair joints, etc.

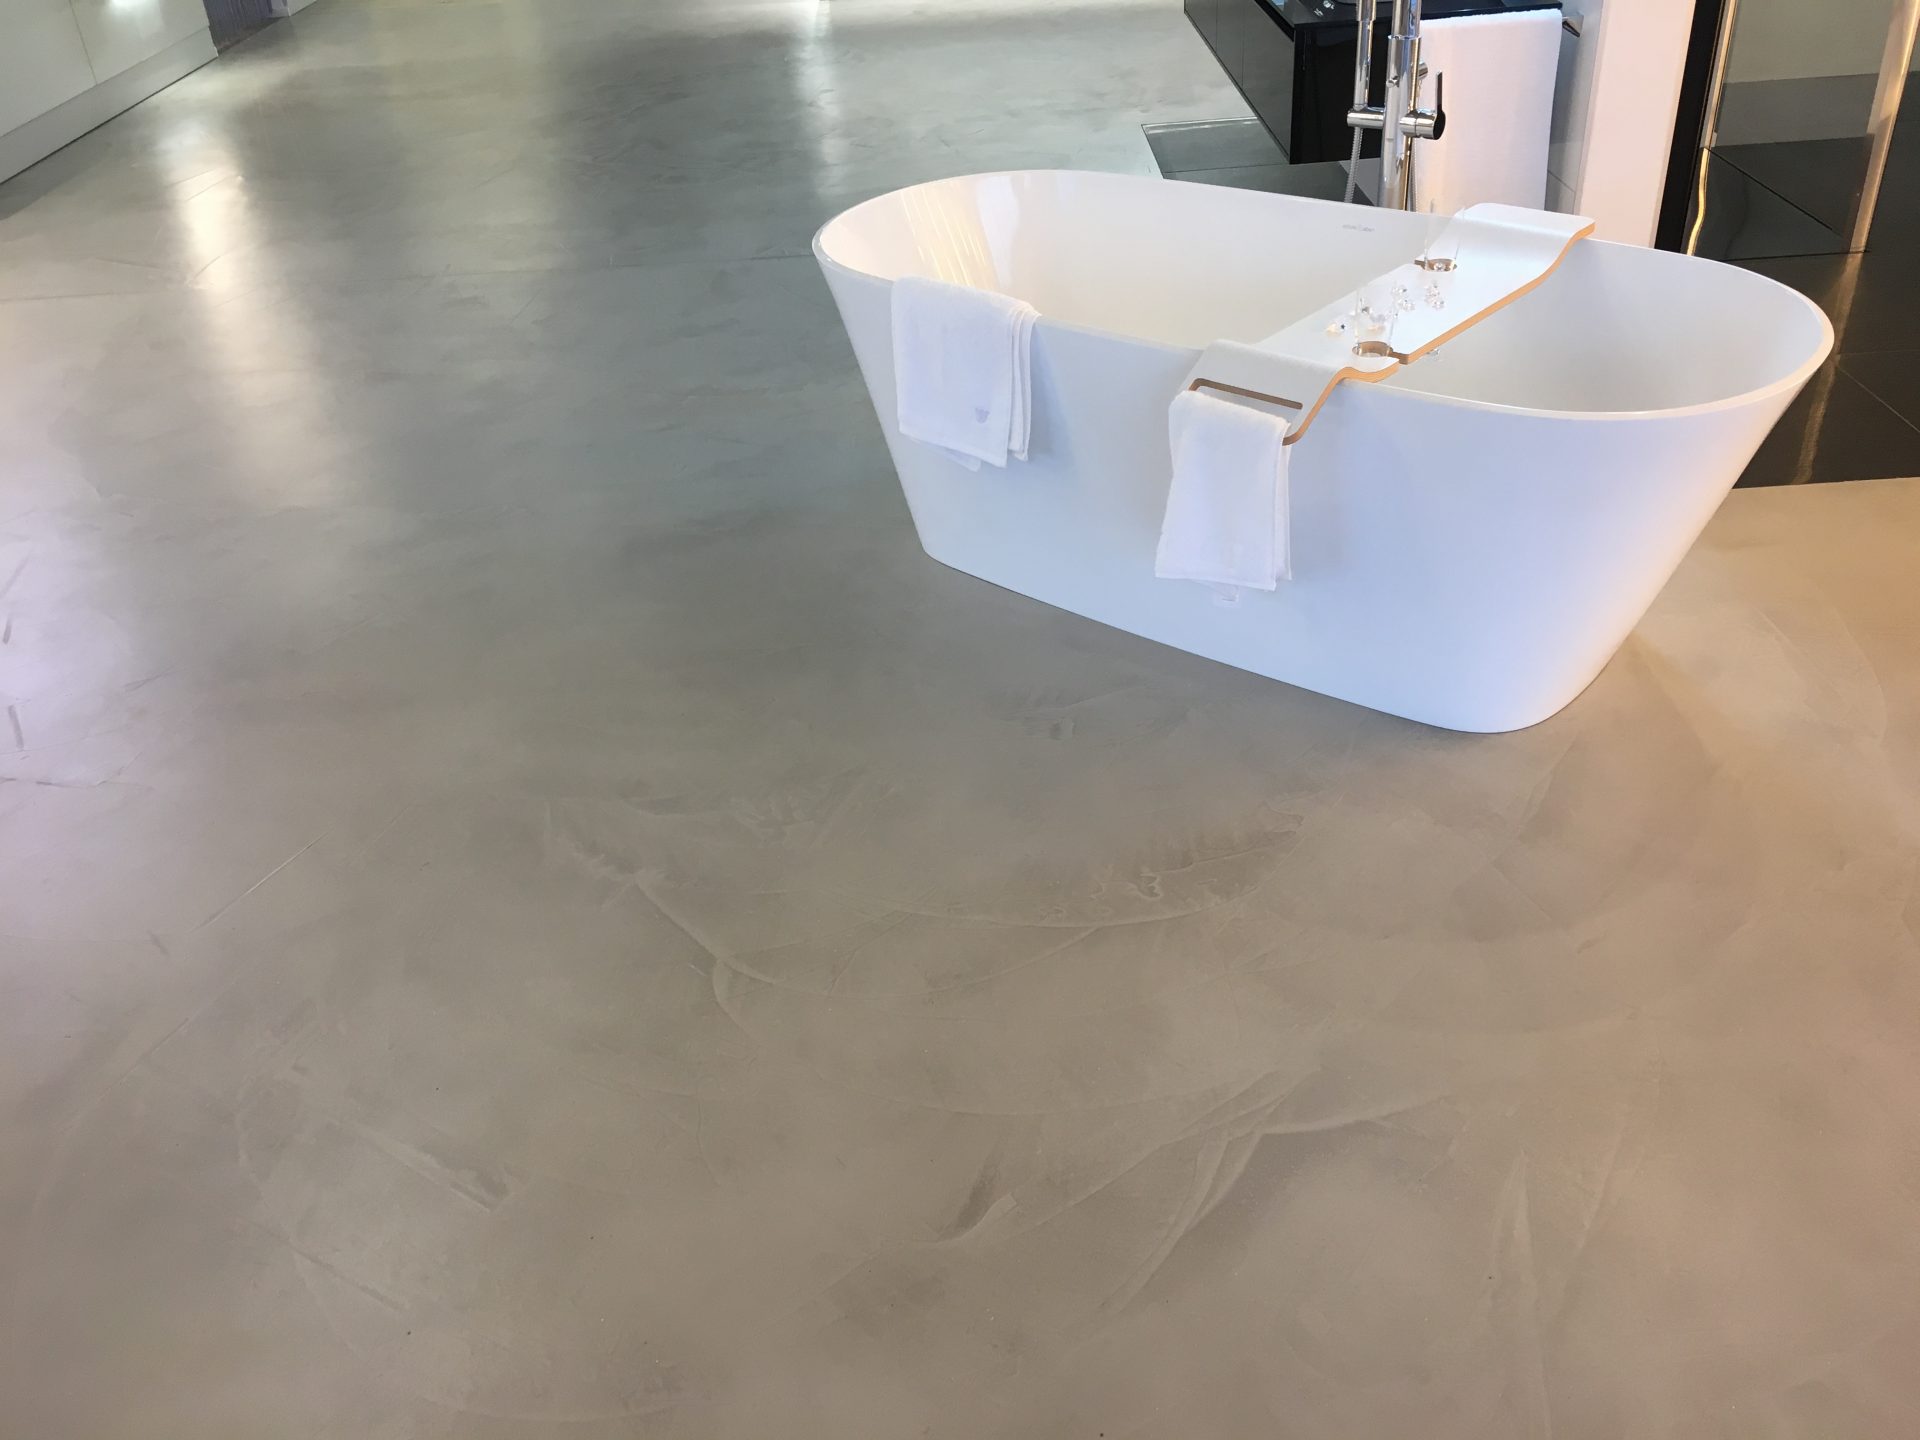
Observe the temperature when laying the stone carpet How to lay stone carpet in rooms
Temperature is an important influencing factor when laying stone carpets. Even if interiors are not normally exposed to the weather, it can be so cold in the building shell, for example, that the hardening of the material is affected. For this reason, gravel, binders etc. should always be processed at temperatures above 15 °C. Room temperature is ideal for laying and curing. But be careful: at high summer temperatures, the reaction of two-component binders in particular takes place much faster!
Different binding agents are used outdoors than indoors. For this reason, gravel floors can also be created here from a floor temperature of 10 °C. However, floor temperatures above 30 °C should also be avoided here.
If the building is within the correct temperature range, the installation of the stone carpet proceeds as follows:
Suitable substrates indoors & outdoors Step 1 - Prepare the substrate correctly
The first step when laying stone carpet is always to prepare the subfloor correctly. This is the prerequisite if the floor covering is to last for several decades. In principle, the material can be laid on many different substrates. Depending on whether it is to be laid on
To ensure that the topsoil remains permanently and firmly bonded to the substrate later on, it should be thoroughly vacuumed. Make sure that it is completely free of dust and grease. It must also be firm and stable. The surface does not necessarily have to be smooth. Slight unevenness can easily be evened out with the granules. It is therefore not necessary to sand down the substrate at length.
Loose pieces of concrete and tiles can be removed quickly by shot blasting. A tiled floor can be reworked without any problems if the tiles are still solid. The laying professionals recommend sanding the tiles for the right grip and sprinkling them with quartz sand after priming or using Qubo® SGF, a primer with quartz sand already in it.
Which primer for which substrate? Step 2 - Professional priming
Im nächsten Schritt wird die gereinigte Fläche mit einer Grundierung versehen. This is essential for the stone carpet to adhere to the substrate. That is why it is extremely important to choose the right primer for the existing substrate. A smooth tile floor places different demands on the primer than a wooden floor with loose boards. In the former case, the primer ensures that the mixture of gravel and binder adheres to the smooth surface during laying.
For installation on wood, there is a primer system in which a glass fiber mat is fixed to the wooden floor and filled with an epoxy resin compound. If the gravel floor is laid on a
A solid primer is very important, especially for absorbent substrates, to prevent seepage of the laying resin. The primer helps to ensure that the gravel floor lies in a bed of epoxy resin. This stabilizes the floor and, in the case of an open system, prevents liquids from penetrating the screed.
There are one- and two-component primers. If you use the latter, you must mix the two components thoroughly before applying. Use a large brush to apply the primer to the edges and corners. Use a large paint roller to prime the surface. Then sprinkle the still damp surface with fine quartz sand so that the granulate compound to be applied adheres better and is easier to work with.
Why you should not mix too much material at once Step 3 - Mix binder with stone carpet material
After the primer has dried, the various components of the binder are whisked together in a sparge drum using a mixer, unless you are using single-component polyurethane as a binder at light-flooded rooms.
Now stir the pebbles thoroughly into the binder. Please pay attention to the mixing ratio specified by the manufacturer. Otherwise you will be amazed when the pebbles come loose from the carpet after a few years! Only mix as much of the material to be laid as you can process within a short time. Otherwise you will have problems when laying. The disadvantage is that the material sets very quickly and it takes a lot of
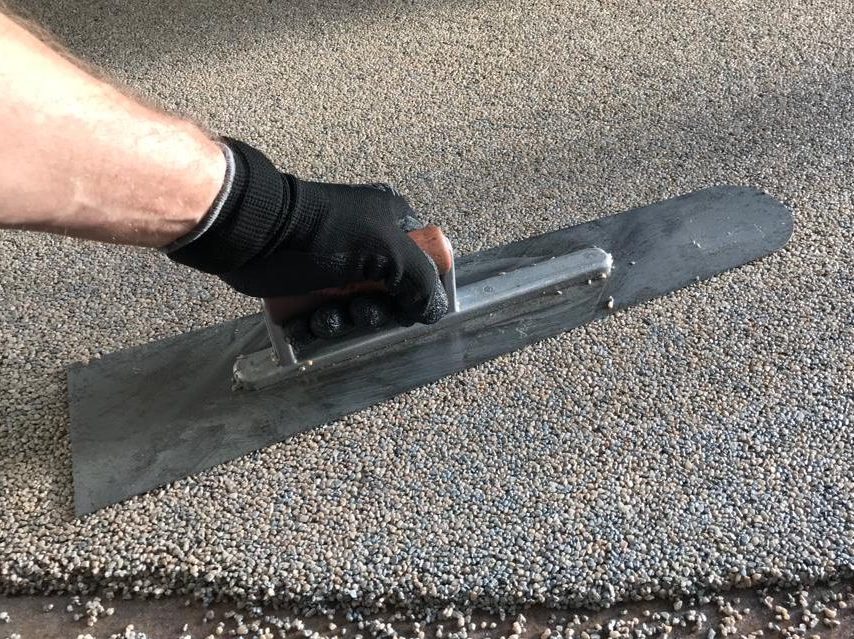
Compacting is particularly important when laying stone carpet Step 4 - Laying stone carpet
Stone carpet is laid in a similar way to screed. The materials used to create the top layer must be stored and processed at a minimum temperature of 15 degrees Celsius and ideally at room temperature. The sword smoother is used to apply, smooth, and compact the material evenly. Careful compaction ensures a level and durable surface. Unevenness must be compensated for with more material. A grazing light lamp is used for inspection.
A pore seal makes cleaning easier Step 5 - Apply pore seal
The now open-pored stone carpet should be filled with a porous seal in areas where hygiene is a top priority. In
kitchens and commercial kitchens, it is easy to spill something or drop something when preparing food. Liquids penetrate down to the screed and start to rot there because there is no time to vacuum them out immediately with a wet vacuum cleaner and it may be forgotten later. It therefore makes sense to apply a
Sealant as protection against petrol, oil and plasticizers Step 6 - Apply sealant
After sealing the pores, a sealant can be rolled onto the gravel base. The protective seal makes it resistant to aggressiveliquids such as oil and gasoline, as well as to plasticizers such as those used in car tires. This means that stone carpets can also be laid in garages and workshops.
The finished gravel floor can be walked on after approximately 24 hours. Furniture can be placed on it after 48 hours. It is fully hardened after one week. Cleaning should be avoided until then.
If the floor has lost its shine after years of wear and tear, it can be varnished with a suitable binding agent (EP or PU). And it will look like new again.
Expansion joints must be used when laying stone carpets
The difference between drying & construction joints
One of the outstanding features of the various stone carpet systems is their uniform, seamless appearance, which can even be achieved on uneven and cracked surfaces. This allows existing cracks and joints to be partially clamped and covered by the top layer. However, a distinction must be made between drying joints and working joints.
A drying joint is created when a large screed surface dries after installation. The screed releases its moisture and contracts in the process. Large, contiguous areas can then tear. The resulting joints are clamped and reworked when laying the stone carpet.
The situation is different with expansion joints. These are so-called
In private homes, these expansion joints are found at transitions to areas with underfloor heating, which means they often disappear invisibly under doors. Expansion joints are also used in industrial production halls when screed surfaces become too large to be laid in one piece.
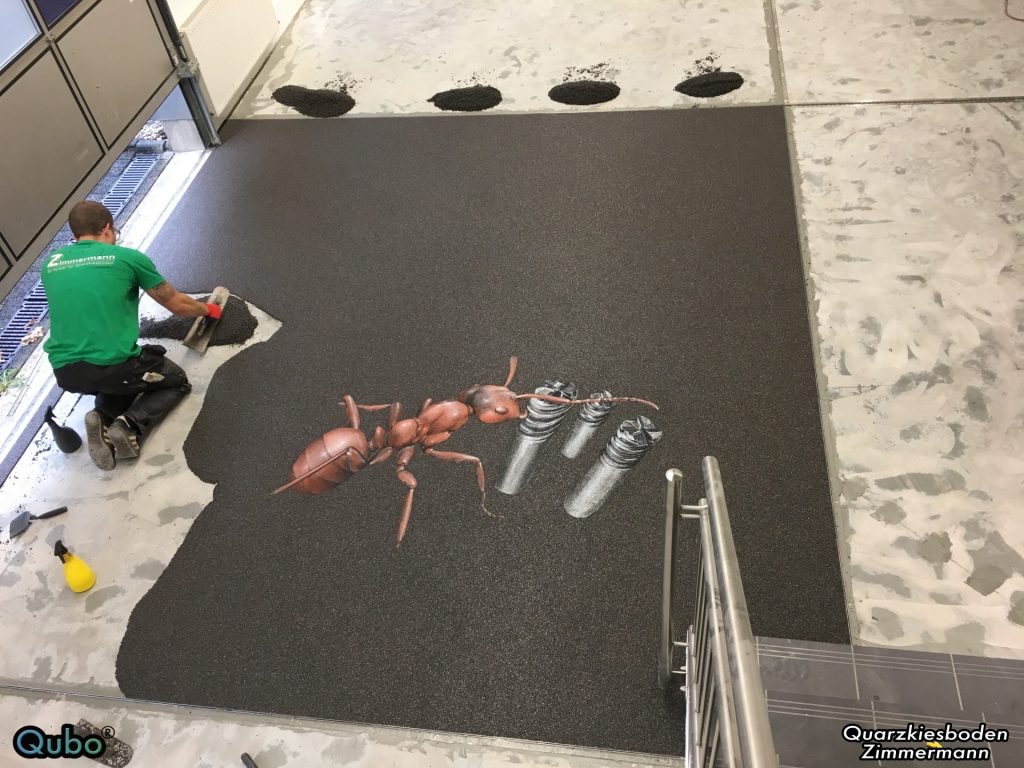
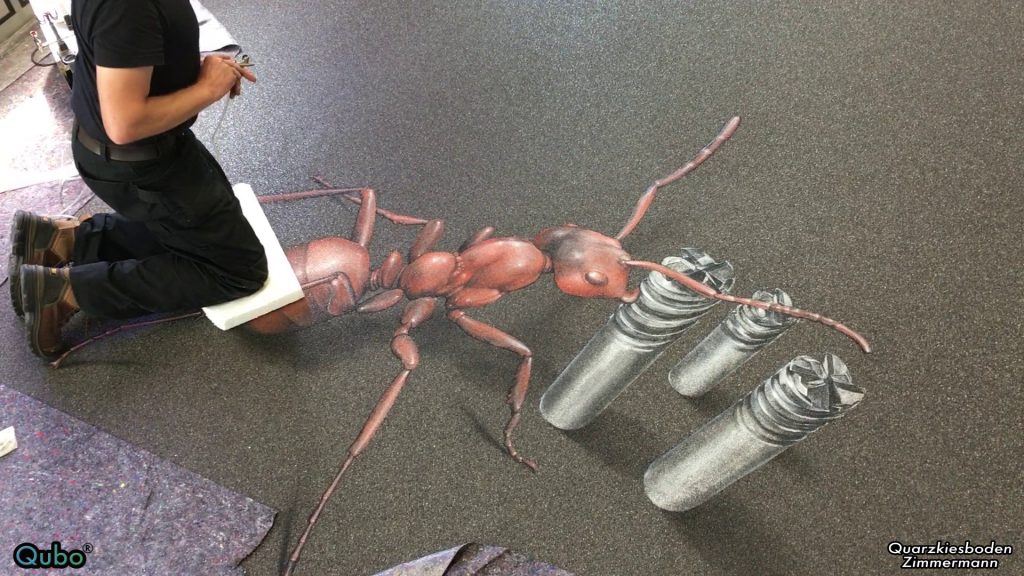
Qubo® Painting company logo at Voha Tosec in Lindlar Stone carpet logo application
Anyone who has read our section on interesting facts about logos on stone carpets knows that motifs such as coats of arms or company logos can be created in advance with Qubo® Painting and easily incorporated on the construction site. The procedure is illustrated here using the example of the company Voha Tosec in Lindlar.
The prepared airbrush motif is firmly attached to the structure so that the installer can work the material to the contours when laying the stone carpet. The picture before this paragraph shows the finished airbrush motif without details such as legs and shadows. You can see the application of the motif and the brushing of the details here:
Airbrush motifs (Qubo® Paintings) can also be used outdoors. The video shows the installation on a terrace.
A gravel floor is the perfect floor covering for terraces, balconies and outdoor staircases Laying stone carpet outside - what to consider
To lay the gravel floor in the outdoor area on terraces, balconies and stairs, the following must be observed: The substrate must have a gradient of 1-2% and be waterproofed – for example with a liquid membrane or a diffusion-open coating.
Pebble floors can be laid on concrete, tiles, stone slabs and wood. The substrate must always be firm for this. For proper drainage, it is important to lay the stone carpet outdoors with open pores. This allows water to drain away through the stone structure. This is one of the reasons why the stone carpet is 100% frost-proof.
Be careful when choosing the right binder! Epoxy resins are not suitable for outdoor installation! Although they are somewhat cheaper in price, polyurethanes are better suited to the large temperature differences in outdoor areas due to their high elasticity. This is why they are used
Why should you have a Qubo® stone carpet installed? 4 good reasons for relocation
You should lay a stone carpet,
- if you want something special (in exhibitions or car dealerships, event locations,… in your own home)
- for heavy-duty use (in workshops and in industry)
- when hygiene is required (in commercial kitchens, restaurants, the food industry, private households, public baths and wellness areas)
- if the structural conditions require it (wooden subfloor in bathrooms or damp basement floors where the installation height is limited)
Qubo® stone carpet is the convincing alternative to conventional floor coverings. What other floor covering offers so many positive properties?
For the answers to these and many other questions, it is worth taking a look at the product page.
We will put you in touch with the right installation company Who installs stone carpets?
If you are interested in installing a stone carpet in your home or business, you should rely on certified installation companies to ensure that the work is carried out professionally and to a high standard.
We specialize in the installation of stone carpets and have a broad network of certified installation companies. These companies are well trained and have extensive experience in the installation of stone carpets.
The so-called Qubo® Points, which are part of the network, are particularly worth mentioning. These partner companies specialize in the installation of Qubo® coating systems. Qubo® is a well-known brand for high-quality stone carpets, and the Qubo® partners are the experts when it comes to installing these floor coverings to perfection.
Please contact us for a cost estimate. We will put you in touch with the right installation company. Together we will ensure …
… for a strong appearance!
Non-binding cost estimate and advice
Link collection
- Stone carpet …
- … Product page
- … systems explained
- … in the outdoor area
- … on balconies
- … on terraces
- … indoors
- … on stairs
- … on walls
- … in the conservatory
- … in the kitchen
- … in garages and workshops
- … in driveways and parking lots
- … Colors
- … laying on tiles
- … Cleaning and care
- … Binder
- … Primers
- … Sealants
- … Motiv & Logos – Qubo® Malerei
- Screed articles worth knowing
- New customer registration with Quarzkiesboden Zimmermann
- ECOtherm – Our partner for milling underfloor heating systems
- sz art of airbrush – Manufacturer for Qubo® painting
- The Qubo® brand
- Overview of Qubo® bases
In erster Linie gibt hier das Einsatzgebiet die Preisgestaltung vor. So können Sie sich im Innenbereich für etwa 80€ zzgl. MwSt. pro m² einen Steinteppich verlegen lassen. Die Kosten sind allerdings von vielen verschiedenen Faktoren abhängig, unter anderem:
- von der Art des benötigten Bindemittels
von der Grundierung
von der Wahl der Fußleisten, wenn diese beispielsweise ebenfalls aus Quarzkies gefertigt werden
von den Arbeitskosten des fachmännischen Verlegers
von der Größe der zu verlegenden Fläche
Im Außenbereich entstehen höhere Kosten, da der Untergrund abgedichtet und der Marmorkies mit UV-beständigem Bindemittel verlegt werden sollte.
In den meisten Fällen verwendet man zum Steinteppich verlegen Colorquarz oder Marmorkies. Hier gibt es allerdings erhebliche Qualitätsunterschiede, etwa beim Staubanteil im Material oder bei den verwendeten Marmorsorten.
Einstreuungen von Glimmerzusätzen und verschiedenen Edel- & Halbedelsteinen sind möglich, bilden allerdings einen weiteren Kostenfaktor.
Colorquarz gibt es in den Körnungen:
1 – 2 mm
2 – 3 mm
- 3 – 4 mm
Marmorkies ist in folgenden Körnungen verfügbar:
1 – 4 mm
4 – 8 mm
- 8 – 15 mm
Natürlich wirkt sich die Wahl der Kieskörnung auf die Verlegestärke des Kiesbodens aus.
Die Verlegestärke des Bodens ist abhängig von der Kieskörnung und dem Einsatzgebiet. Normaler Quarzkies mit 2 – 3 mm Korngröße kann im Innenbereich mit einer Stärke von 6 mm verlegt werden.
Im Außenbereich sowie auf Treppenstufen im Innenbereich wird aufgrund der Belastung eine Verlegestärke von 8 mm genutzt.
Auf Außentreppen werden schließlich 10 mm Material aufgetragen.
Senkrechte Flächen wie Setzstufen, Sockelleisten und Wände werden immer in 6 mm verlegt.
Je größer die Körnung des Kieses ist, desto höher ist die Aufbauhöhe des Bodenbelags. Somit benötigt man pro m² mehr Kies und auch zusätzliches Bindemittel. Dementsprechend steigt auch der Preis.
Die Grundierung bildet die Haftbrücke zwischen dem Baukörper und dem Kiesboden. Das Material kann auf nahezu jedem Untergrund aufgebracht werden, zum Beispiel auf Fliesen, Holz, Stein, Beton und Metall. Verschiedene Untergründe setzen unterschiedliche Vorbereitungsschritte voraus.
Auf Fliesen und Metall ist beispielsweise eine Grundierung notwendig, die der glatten Oberfläche Halt beim Steinteppich Verlegen gibt.
Auf porösem Stein und saugfähigem Estrich muss mit der entsprechenden Grundierung verhindert werden, dass das Bindemittel aufgesaugt wird, das den Halt der Kiesel gewährleisten soll.
Um Holzdielen mit einem Kiesboden zu beschichten, muss erst die Bewegung der Dielen gegeneinander gestoppt werden. Zu diesem Zweck spachtelt der Verleger zuerst eine Gewebematte auf den Holzboden. Ist die Spachtelmasse getrocknet, wird der Kiesboden aufgetragen.
Vor allem in Küchen und Bädern sollte der Kiesboden aus hygienischen Gründen mit einem Porenverschluss versehen werden. Er verhindert, dass ausgelaufene, klebrige Flüssigkeiten in die Kiesstruktur eindringen können. Während eingedrungene Flüssigkeiten bei einem offenen Boden nur schwer zu entfernen sind, ermöglicht der Porenverschluss ein müheloses Reinigen durch Nasswischen.
Hunde, Katzen und Co. fühlen sich auf der strukturierten Oberfläche viel wohler als auf glatten Bodenbelägen wie Fliesen oder Laminat, da sie auf Steinteppich nicht rutschen. Allerdings ist es ratsam, den Boden mit einem Porenverschluss zu versehen, um eine leicht abwischbare Fläche zu erhalten.
hohe Drainagefähigkeit durch offenporige Struktur
schnelles Trocknen bei Sonne und Wind
pflegeleicht und selbstreinigend
100% frostsicher
UV-stabil
- sanfter, massageähnlicher Gehkomfort beim Barfußlaufen
Das wichtigste für die Verlegung von Kiesböden im Outdoor-Bereich ist die Vorbereitung des Untergrundes. Diese gewährleistet die Haltbarkeit des fertigen Bodens.
Das liegt zum einen daran, dass ein grundierter Unterboden eine deutlich erhöhte Haftung für den aufgespachtelten Kies aufweist. Zum anderen hält eine Abdichtschicht beispielsweise Regenwasser fern vom Baukörper, was eine dauerhafte Haltbarkeit unterstützt.
Möglichkeiten zur Abdichtung von Baukörpern sind
- die Abdichtung mittels einer Epoxidharzdichtung mit Dichtungsbahn
- die Abdichtung mittels einer Flex-Dichtschlämme
Um Regenwasser effektiv abführen zu können, wird der Bodenbelag mit einem Gefälle von mindestens 1,5% verlegt.
Nein, im Außenbereich wird der Steinteppich grundsätzlich als offenes System verlegt, um die Drainagefähigkeit und damit den Ablauf von Regenwasser zu gewährleisten. Dadurch sind sie zu 100% frostsicher und deshalb ideal als Poolumrandung sowie als Belag für Balkone, Terrassen, Eingangsbereiche, Außentreppen und Loggien.
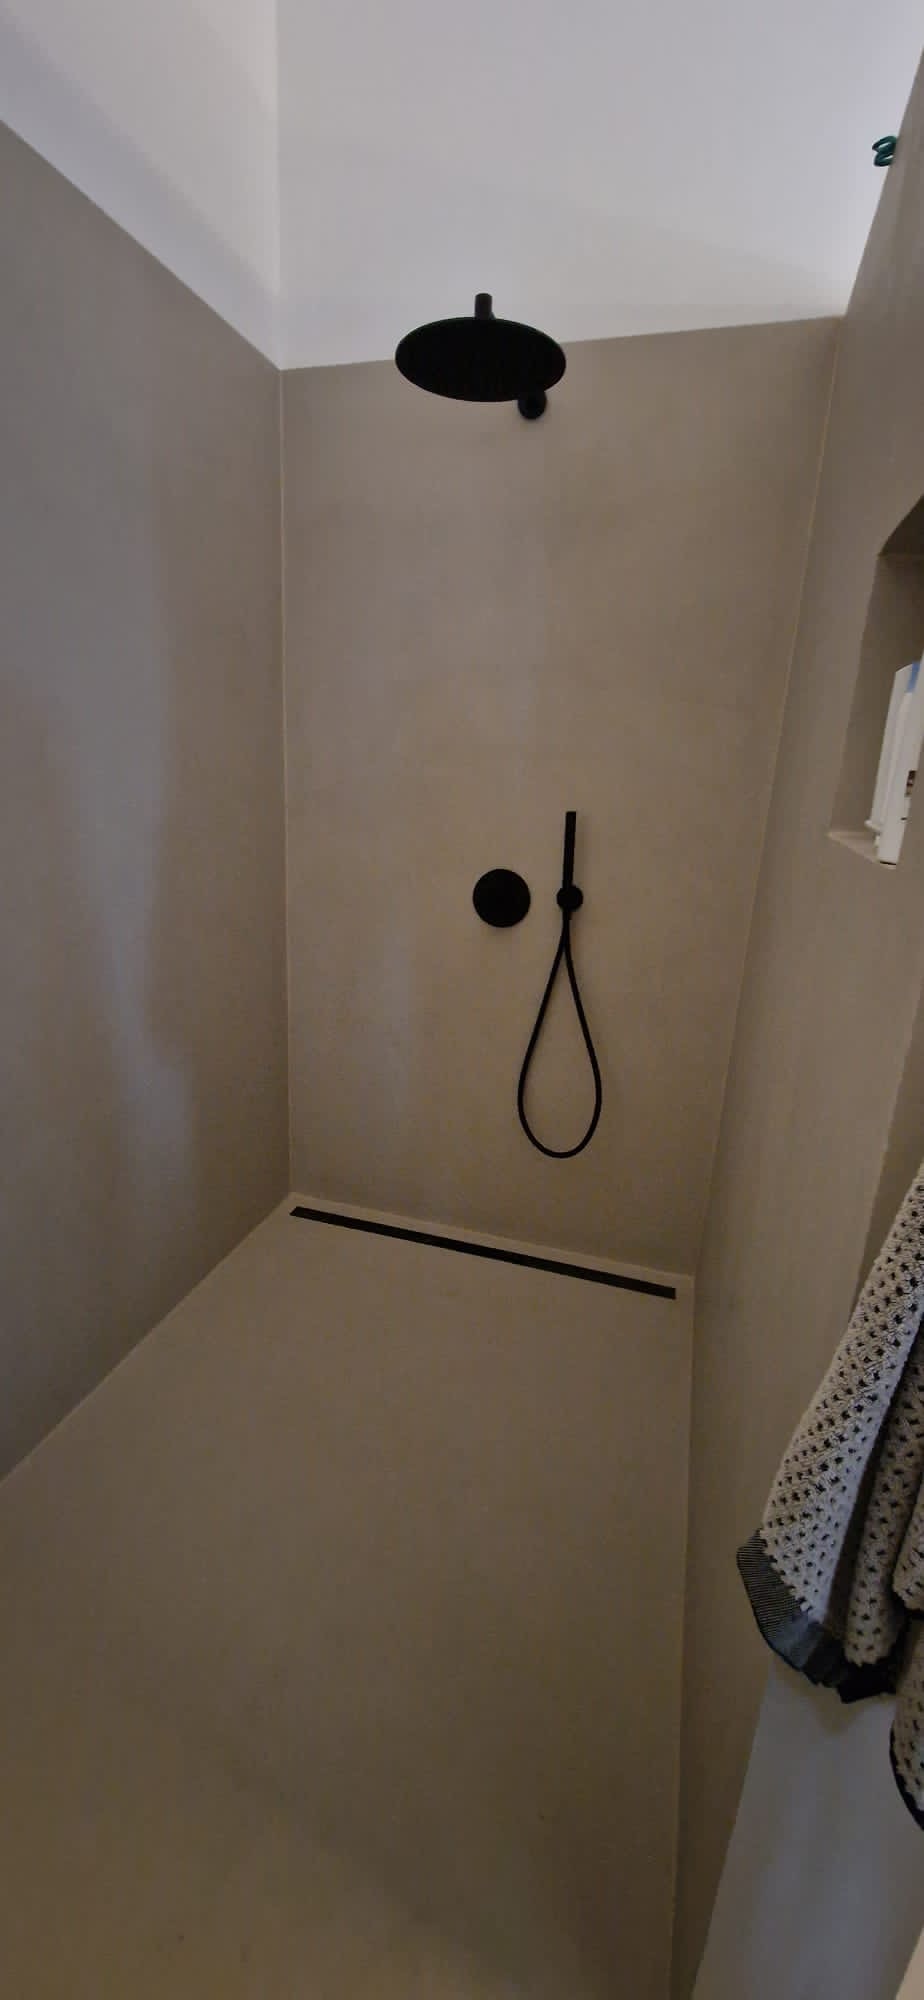
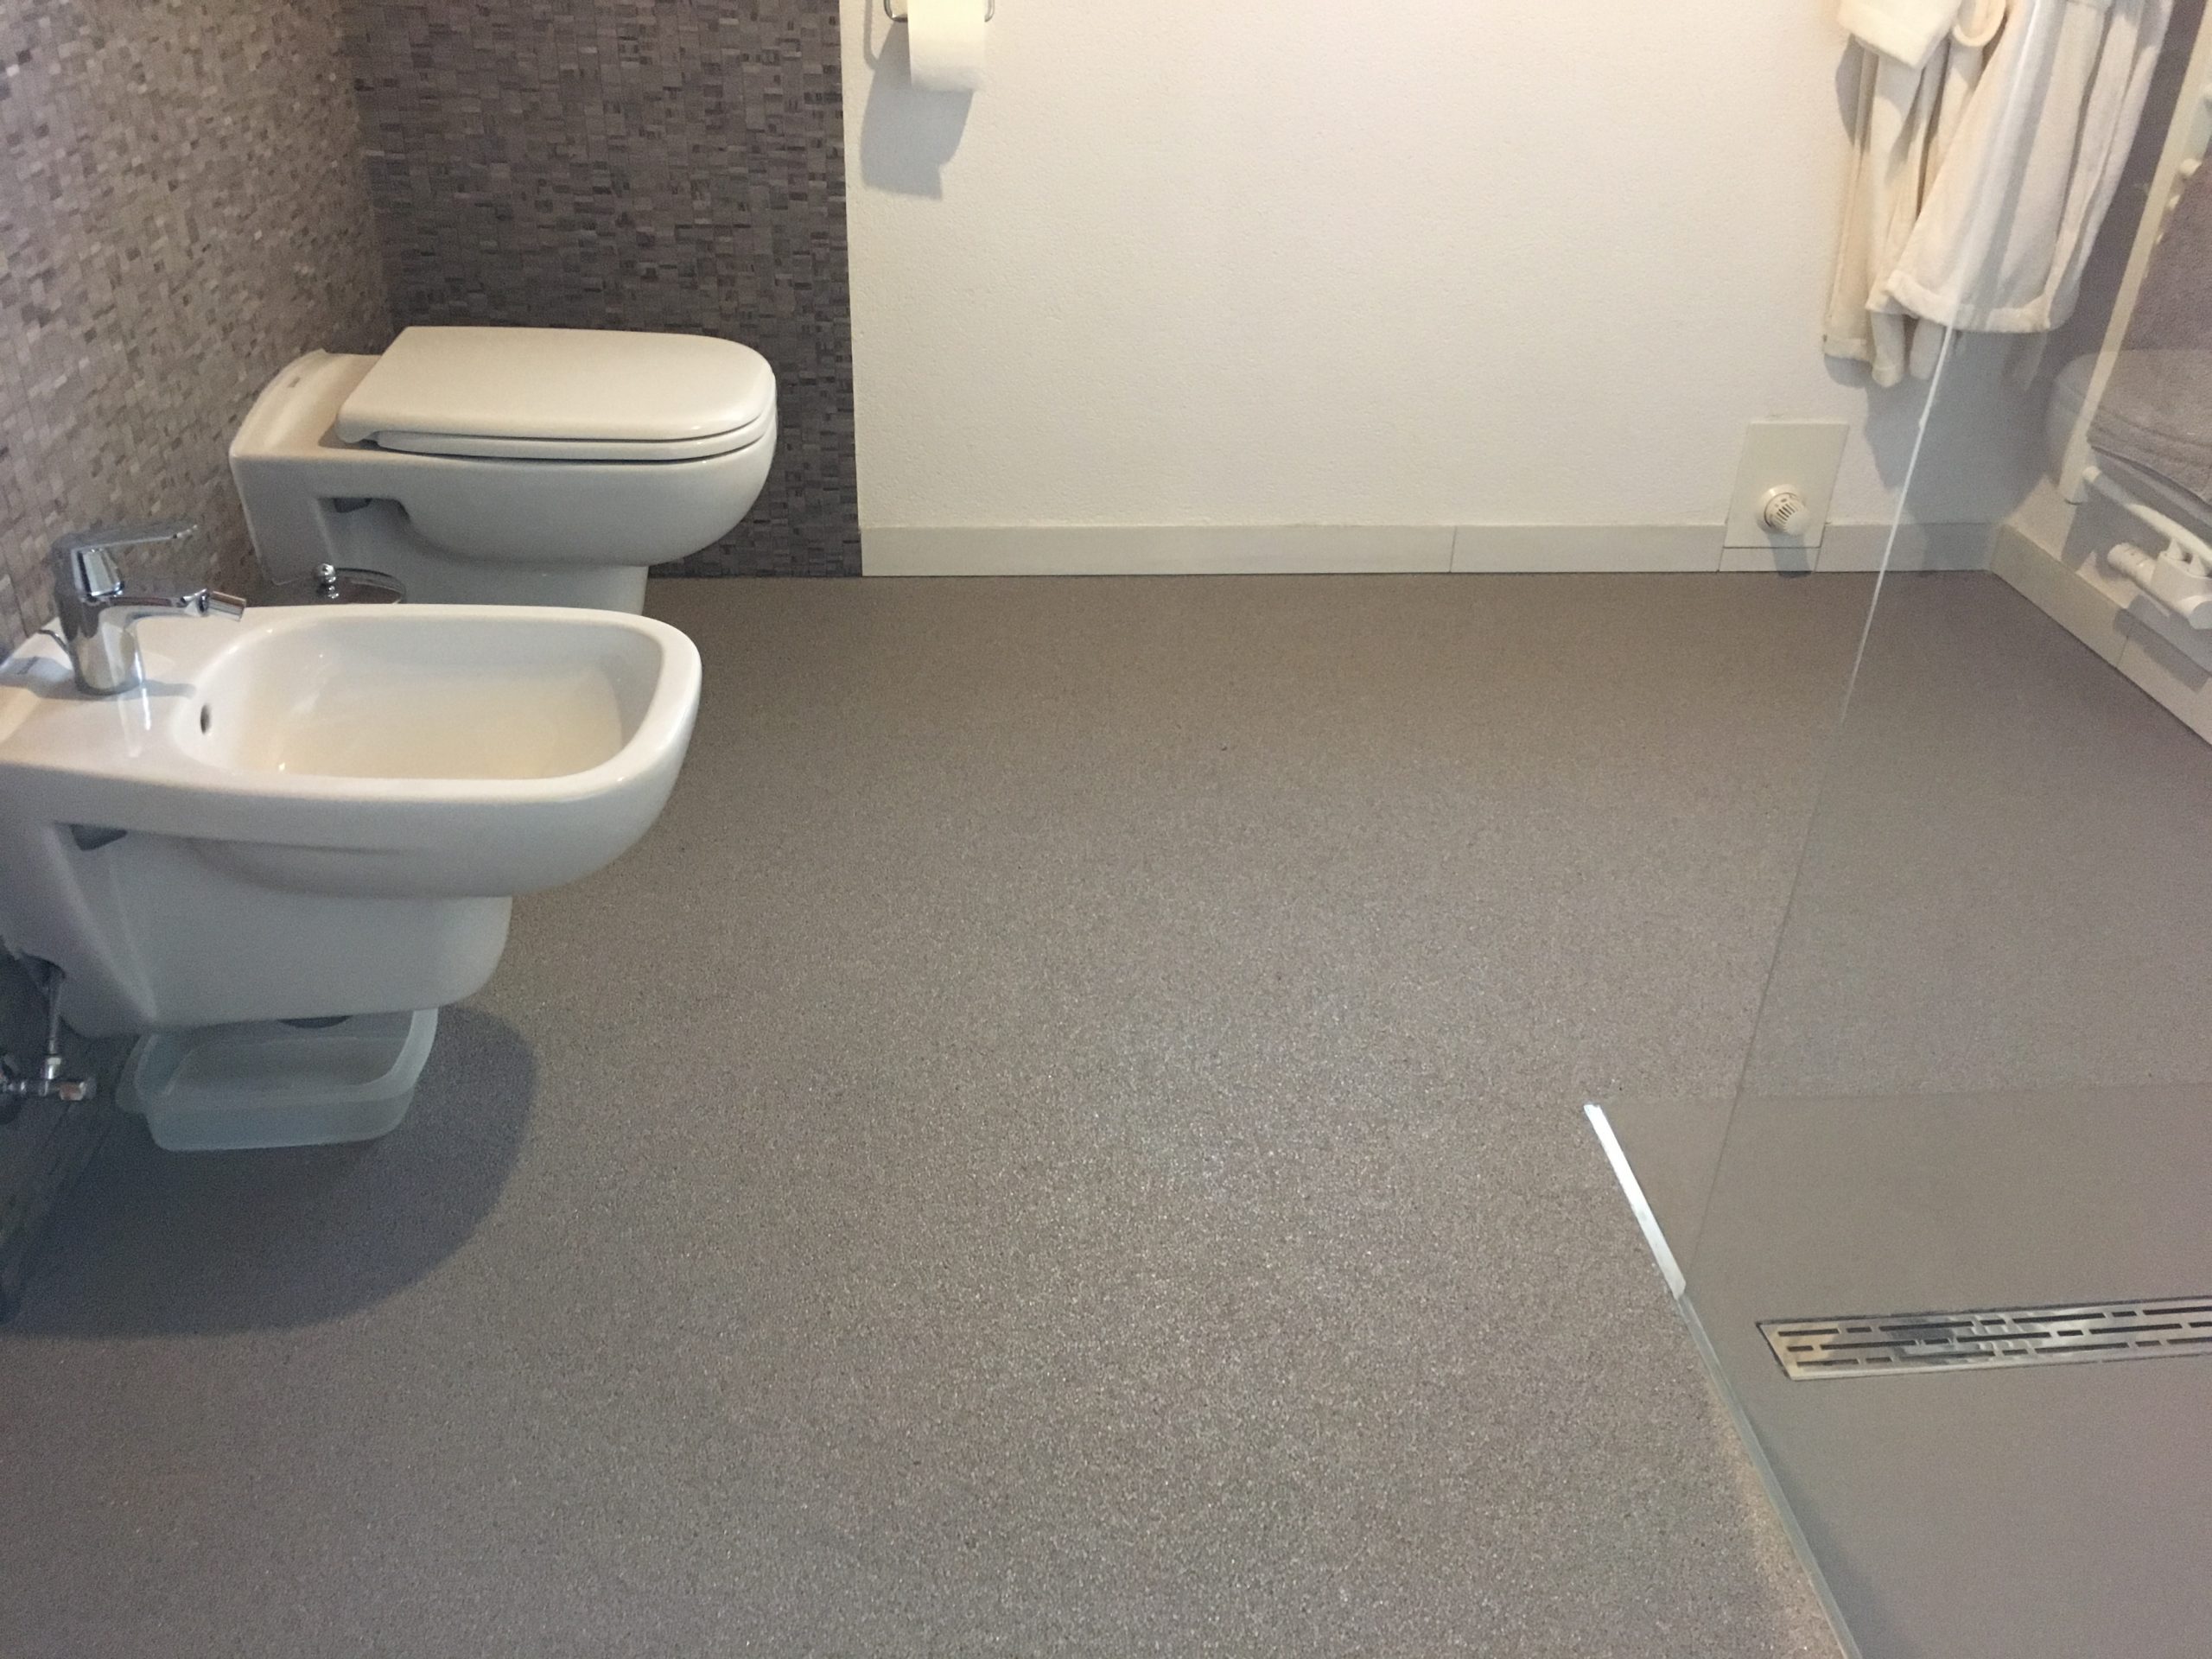
Wir möchten darauf hinweisen, dass wir Steinteppiche im direkten Duschbereich nicht empfehlen. Die Gründe dafür sind im grundsätzlichen Aufbau des Bodens und der Nasszelle zu finden. Genau wie der Fliesenkleber unter einer Fliese keine vollständig aufliegende Fläche ohne Lufteinschlüsse bildet, verbleiben auch unterhalb eines versiegelten Kiesbodens Poren zurück.
Wird nun nach Jahren eine Silikonnaht undicht und lässt Wasser etwa aus einer Armatur zwischen den Wand- oder Bodenbelag und die Abdichtung des Baukörpers dringen, reagiert der transparente Porenverschluss mit dem Wasser und bildet weiße Flecken. Da diese unterhalb der Versiegelung entstehen, lassen sich diese weder wegwischen, noch durch Trocknung wieder entfernen.
Deshalb stufen Versicherungen Steinteppich als nicht für Nasszellen geeignet ein und ersetzen entsprechende Beschichtungen im Schadensfall nicht. Deshalb empfehlen wir Mikrozementbeschichtungen für Duschen. Bei diesen entsteht keine wasserführende Schicht zwischen Bodenbelag und Untergrund, sodass hier keine Gefahr durch Unterfeuchtung besteht. Aufgrund der vielen Individualisierungsmöglichkeiten von Mikrozement lässt sich dieser auch mit einem Kiesboden kombinieren. Sprechen Sie uns einfach an.
Ja. Eine mit Steinteppich beschichtete Treppe weist nach dem Verlegen bereits eine Rutschhemmklasse von R10 auf.
Durch spezielle Versiegelungen lässt sich die Rutschhemmklasse zusätzlich auf R11 bzw. R12 erhöhen.
Je nach Ausführung der Treppe dauert die Sanierung 3-5 Tage. In Sonderfällen ist auch eine Verlegung innerhalb noch kürzerer Zeit möglich. Für eine genauere Bestimmung der Dauer bei Ihrem Bausprojekt sprechen Sie uns einfach an.
All unsere Kiesböden setzen auf natürliche Steine als Grundmaterial. Deshalb wird Steinteppich von vielen auch als Natursteinteppich bezeichnet.
Der Kies ist naturbelassen und gefärbt erhältlich.
FAQ
Details und Fakten, Kennzahlen und Erläuterungen – Hier finden Sie Antworten auf häufig gestellte Fragen zu unseren Qubo® Beschichtungssystemen. Sollten noch Einzelheiten ungeklärt bleiben, sprechen Sie uns einfach an. Wir beraten Sie gern persönlich und zeitnah.